Combinations – Zorki 4 and Redscaled Film

Shooting with the Red October theme is one thing, shooting a Soviet Zorki 4 camera with redscale film is a combination that doesn’t get any more red. This ensures that the tool is red (aka Soviet), but also the result (aesthetically).
The thought of this came through a suggestion from a friend on the yearly Red October theme that is shot by photographers that appreciate cameras made from former Soviet countries. They do have a reputation of quality issues, but also a fanatical following. This is sometimes attributed with the unique look the glass from the Soviet factories gives photographs.
Redscale is a way of modifying how colour film is shot to produce a very red and yellow look to it. On exactly how to do it, and how it was prepared for this article, you can read about it here; Redscale Film – Reverse it!
The Combination
The Zorki 4is a “Leica copy” rangefinder built by KMZ, utilising the Leica Thread Mount (LTM), which accepts any lens built in that eco system. Keep in mind the pitch on the Zorki is slightly different, so it can cause infinity focus issues if you mount true Leica lens. You can read a review on this camera here.
Normally my pairing with this camera is the fantastic Jupiter 8lens, but when I had purchased the Zorki 4, it came with two lenses. The other lens that I have been quite keen to try out is the Industar 61 53mm f/2.8 lens. Interestingly, I found the Industar a lot easier to use, as it has click stops for the aperture, and the focus ring is quite easy to grab hold of.
The final part of this combination is the film. In this case, as I was reversing it, and effectively negating any of the work that has been done to it for colour representation. I decided a consumer grade film would be good to try out. I had read good things about Kodak Ultramax 400, specifically that it is punchy, contrasty and has a decent amount of grain to it. When you redscale film, it does accentuate the grain, so this was perfect.
I took a roll of the Ultramax and reversed it into a reloadable 35mm cartridge. This is not a very hard process and it went off without a hitch, which is outlined here. Just remember to overexpose it (usually by one to two stops), as you are shooting through the base and anti-halation layer. Something I should have taken more note of.
For scanning the film, it is worth noting, that you should not try and use anything that attempts to correct colours. For instance the ColorPerfect plug in. Scan as raw as you can from the scanner, as you have gone to considerable time to prepare the film to produce the red-ish result.
The Scenario
During September, when I would have been preparing for Red October, I sustained a back injury. The end result was a hospital stay and then off my feet for a couple of weeks. So to be able to do something towards shooting with this theme, I first wrote about redscale and how to apply it to film. By then I was in a position to start shooting again. It was obvious the follow up should be shooting it in a Soviet camera.
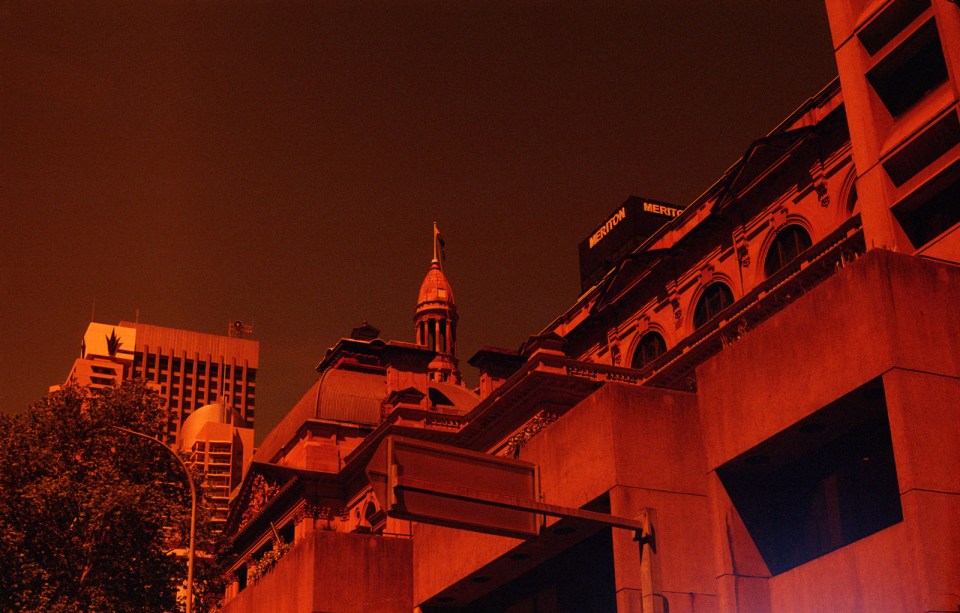
I prepared the film one night, and loaded up the Zorki. During the next few days I shot everything I thought would look good with a grainy red and apocalyptic feel to it. This included architecture, car parks, sports parks, cafes and even a DeLorean motor car.
The Industar lens was great to use, and the results from a purely photographic view are actually very good. I have a suspicion that this a forgotten gem. The proof will be when I shoot with normal colour film and can see the colour rendition.
When I received the film back from the lab, what I did find is that I had misunderstood the instructions of how to shoot redscale. I had read that the closer to box speed, the more red it stays, and the more you overexpose the more yellow is introduced. What I hadn’t understood is that you still needed to overexpose, to allow for shooting through the base and the anti-halation layer. With that, I did end up with quite a few unusable underexposed frames. Luckily my sunny 16 metering tends to be towards the overexposure side, so I did get some good results. With a committed time of when I would post this article, I unfortunately did not have a chance to re-shoot. I am quite pleased with the results that did work out though.
Scanning the results was a breeze, for once I did not have to try and colour match or worry about profiles etc. I did not even need to apply any adjustments for the ones that turned out, their contrast and grimy feel is exactly what I was working towards.
If you want to try something different, give redscale a go. It is fun and results are very intriguing.
The Results


